I have not actually be involved with any clients that use Essbase in standalone mode since pre version 9 days and to be honest I really don’t see the point in it nowadays and it is not really true standalone as you still need to configure the Shared Services registry but saying that I do notice from forum posts that it is still being used and the question about using external authentication has cropped up a few times.
I must admit I have never deployed Essbase in standalone mode in version 11 and I didn’t know the answer how external authentication could be set up, instead of let this niggle at me not knowing I thought would have a look into it in some more detail.
In earlier versions you could populate an xml based file with the external directory information and update the essbase.cfg with details to the file using the AuthenticationModule setting like so:

If you try this in version 11.1.2.2 (maybe the same for earlier versions of 11) then the output in the log lets you know this method is not possible anymore.
[Sun Dec 01 11:23:03 2012]Local/ESSBASE0///4604/Error(1051223)
Single Sign On function call [css_init] failed with error [CSS Error: CSS class not found: NativeCAppImpl]
So what is the answer, well Essbase version 11 in standalone mode using external authentication does require Shared Services but you don’t have to deploy the web application, as always you don’t want me waffling on and you want to see how it is done so here goes.
The process I carried out if on 11.1.2.2 but I am sure it is pretty similar for all 11 versions; I am not going to into too much detail as I am sure you will get the idea.

When you start the installer make sure Foundation Components is selected (you don’t need Oracle HTTP Server if you have extracted the files) and of course Essbase Server is selected.
Once the installation has successfully completed start up the configurator.

You will need a relational database for Shared Services and the Registry.

The only requirement is to select “Configure Essbase Server”

Enabling “Deploy Essbase in standalone mode” in the most important configuration step and unless there is a definite need the other settings can be left as default.

As the Foundations components were installed a username and password is required for the admin account, this will be used as the admin account for logging into Essbase even though Shared Services has not been deployed.

Once Essbase has been deployed into standalone mode and the service started you should be able to log into Essbase using Maxl with the account information provided in the configurator.

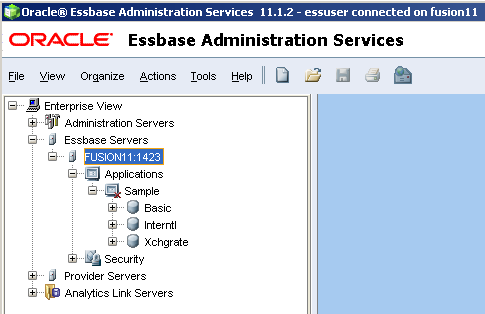
If you have an instance of EAS then you can see that Essbase is in standalone mode as the options are available to create new users/groups.
Well that is Essbase easily set up in standalone mode so what about setting up the external authentication.

The first step is to add “AuthenticationModule CSS” to the essbase.cfg

Once the configuration has been updated then essbase needs restarting to pick up the new setting, in the essbase.log it should output that the external authentication module is enabled.
The next step is configure the external authentication provider details which would be quite simple if Shared Services was deployed but as it not then the trick is to manipulate the Shared Services registry using the epmsys_registry utility.
The directory configuration used to be an xml file held in the file system but from version 11 this was moved into the registry, I did blog about this a number of years ago which you can read about in more detail here.
The epmsys_registry utility is available in
<MIDDLEWARE_HOME>\user_projects\<instancename\bin
To extract the configuration file the following can be executed from command line.
epmsys_registry.bat view FOUNDATION_SERVICES_PRODUCT/SHARED_SERVICES_PRODUCT/@CSSConfig

This will extract the file to the same location as the utility.
I must admit I have never deployed Essbase in standalone mode in version 11 and I didn’t know the answer how external authentication could be set up, instead of let this niggle at me not knowing I thought would have a look into it in some more detail.
In earlier versions you could populate an xml based file with the external directory information and update the essbase.cfg with details to the file using the AuthenticationModule setting like so:

If you try this in version 11.1.2.2 (maybe the same for earlier versions of 11) then the output in the log lets you know this method is not possible anymore.
[Sun Dec 01 11:23:03 2012]Local/ESSBASE0///4604/Error(1051223)
Single Sign On function call [css_init] failed with error [CSS Error: CSS class not found: NativeCAppImpl]
So what is the answer, well Essbase version 11 in standalone mode using external authentication does require Shared Services but you don’t have to deploy the web application, as always you don’t want me waffling on and you want to see how it is done so here goes.
The process I carried out if on 11.1.2.2 but I am sure it is pretty similar for all 11 versions; I am not going to into too much detail as I am sure you will get the idea.
When you start the installer make sure Foundation Components is selected (you don’t need Oracle HTTP Server if you have extracted the files) and of course Essbase Server is selected.
Once the installation has successfully completed start up the configurator.

You will need a relational database for Shared Services and the Registry.

The only requirement is to select “Configure Essbase Server”

Enabling “Deploy Essbase in standalone mode” in the most important configuration step and unless there is a definite need the other settings can be left as default.
As the Foundations components were installed a username and password is required for the admin account, this will be used as the admin account for logging into Essbase even though Shared Services has not been deployed.

Once Essbase has been deployed into standalone mode and the service started you should be able to log into Essbase using Maxl with the account information provided in the configurator.

If you have an instance of EAS then you can see that Essbase is in standalone mode as the options are available to create new users/groups.
Well that is Essbase easily set up in standalone mode so what about setting up the external authentication.

The first step is to add “AuthenticationModule CSS” to the essbase.cfg

Once the configuration has been updated then essbase needs restarting to pick up the new setting, in the essbase.log it should output that the external authentication module is enabled.
The next step is configure the external authentication provider details which would be quite simple if Shared Services was deployed but as it not then the trick is to manipulate the Shared Services registry using the epmsys_registry utility.
The directory configuration used to be an xml file held in the file system but from version 11 this was moved into the registry, I did blog about this a number of years ago which you can read about in more detail here.
The epmsys_registry utility is available in
<MIDDLEWARE_HOME>\user_projects\<instancename\bin
To extract the configuration file the following can be executed from command line.
epmsys_registry.bat view FOUNDATION_SERVICES_PRODUCT/SHARED_SERVICES_PRODUCT/@CSSConfig

This will extract the file to the same location as the utility.

The file extracted will be named Comp_1_SHARED_SERVICES_PRODUCT_CSSConfig

The file can be edited with any text editor and currently will only contain the native provider information.
The file now needs updating with the external directory information and I cheated a little and examined a file from a different EPM instance which was configured to use external authentication to get an understanding of the structure, the structure is quite similar no matter which version you are using.
Here is an example of the file once I had updated it with information to connect to a Microsoft Active Directory:

Once updated I saved the file in the same location as the original export.

The file format is not important but I saved it as an xml so I could easily view the format in a structure way.
The utility is used again to import the file into the Shared Services registry and replace the existing configuraton.
epmsys_registry.bat updatefile FOUNDATION_SERVICES_PRODUCT/SHARED_SERVICES_PRODUCT/@CSSConfig E:\Oracle\Middleware\user_projects\essbase\bin\CSSConfig.xml

Once successfully imported the essbase service is restarted to pick up the new configuration.
To test the configuration I first inspected the essbase related logs to make sure there were no issues and then created a new user in essbase with a user that exists in the external directory.

Using EAS a new user was created selecting the authentication type as “Use external authentication”

The user was given "Write" access to the Sample.Basic database.

The same could also be achieved if EAS is not available using Maxl.
To confirm that the external authentication was working I logged into EAS using the newly created user and all was expected.
It is worth pointing out that if you have deployed EAS using the same Shared Services registry then EAS will also be using the external authentication.
So there you go, it is not something I will probably have to do very often but I am sure it will help those baffled with what to do.
