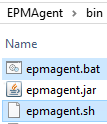
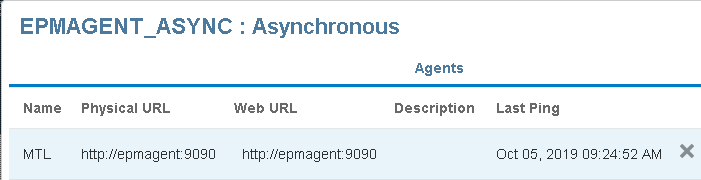
Back again to continue with the series looking at the EPM Cloud Integration Agent. In the last part I went through getting up and running with the agent in asynchronous and synchronous modes.
Now that the agent is running, it is time to look at our first integration. In this post I will go through extracting data from a remote relational database and loading to EPM Cloud.
The first example will be against an Oracle database, but I will also cover SQL Server in the next post. The good news is you are not restricted to these two database types, you have the power to connect to any source.
Before starting out, you need to be sure that you can connect to the source database from the machine running the agent. I simply confirmed this by telnetting to the Oracle database server and port.

For simplicity, I have created a database view which queries the tables and data I am interested in and produces the desired output. It doesn’t have to be a view, data can be extracted using a SQL query against the source tables.

The next stage is to create a SQL query in Data Integration that will be executed by the agent to extract the data.
Go to Data Integration > Actions > Query

Add a new query.

Enter a new name for the query and the SQL statement.

You will notice that I have ~SCENARIO~ in the SQL statement. This is a bind variable and must be enclosed with a tilde, this allows you to filter the data extract. It is possible to set the value either at data load rule or application level. These can also be updated using custom event scripting and I will provide an example in the next part.
The most important part about the SQL statement is the column names. They will have to match with what is created in the data source which I will get on to shortly.
It is possible to use alias names for the column in the SQL query.

Once the query has been created it is possible to edit, delete or create additional queries.

The next step is to create a comma separated file with one line containing all the possible columns that can be returned from various SQL queries. The file I have created has more columns than the SQL query above, this is because I intend to have additional queries that return different data sets.

As I just mentioned it is important that the names match to those that will be returned from the SQL queries.
The name of the file will become the name of the target application in Data Management. I know it is confusing calling it a target application when it is a source.
The mindset that you need to be in is to treat the integration as a file-based integration even though you are connecting to a relational source. The agent will execute the SQL query against the source database, extract the data and create a file, this file will contain column headers that match the columns in the SQL query. The file will be automatically uploaded to the cloud and imported where the column headers in the file will be matched to what has been defined in the cloud.
It should become clearer as I go through the full process.
To create the Data Source, go to Data Management as there is not yet full parity in Data Integration.
Go to Target Application > Add > Data Source

From the dropdown select “On Premise Database”, this doesn’t mean the database must be on-premise, it can cloud or on-premise if the agent has good connectivity to it.

This will open the file selection window. Upload the file with the column names and select it.

The file name now has been converted into the application name. A prefix can be added if there is already an application with the same name.

An application will be created with dimensions based on the header columns in the selected file.

I know it is a little confusing because they are really source columns and not dimensions.
The target dimension class should be left as “Generic” and no “Data Table Column Name” assignments are required. If your SQL extracts are going to include additional columns, then you can manually add them at any point to the application.
Next on to the Application Filters tab which provides options to configure the connection to the source database.

Data Extract Query – This is the name of the SQL query to execute. It is possible to define this at application or rule level.
Delimiter – This will be the delimiter that is used when the agent creates the data extract file.

Credential Store – This provides the option to either store database connection information in the cloud or in a file. If “Cloud” is selected the connection information is entered in the application filters. If File is chosen, a file will need to be created in the agent’s application data config directory in the same location as the agent initialisation file. The database user’s password in the file will require to be encrypted using the “encryptpassword” script.
For this example, I am going to go for the “Cloud” option and will cover “File” in the next example.
JDBC Driver – This is the driver for connecting to the source database. Currently there is only “Oracle” and “Microsoft SQL Server”, but I am sure this will increase in future releases. This doesn’t mean you can connect to only those database types though, with the use of event scripting you can connect to pretty much any source.

JDBC URL – This is the database connection string. The Oracle syntax I will be using is
jdbc:oracle:thin:@dbhost:port/service
Username/Password are for the user you want to connect to the database with.
Fetch Size – This is the number of records that the JDBC driver fetches with each call to the database when executing the SQL query.
This is my completed set of property values.

In my SQL query I was filtering on scenario and included a bind variable. To create a bind variable, select “Edit”.

This will then display all the application filters.

A new filter is added for the bind variable. The name must match to that in the SQL query. The prompt will be displayed at the display level, which can be application/rule.

The display order should be a value which is not already being used. It will be the order they are displayed in the UI. The validation type should be set to “None”.
I also updated the display level for the data exact query to be “Application and Rule”. This will mean you can override the query defined at the application in the data load rule.
The integration can now be built up as if building a standard file-based one.

The delimiter should match what has been set in the application filters.
To keep things simple, I have used expressions to map the source values directly to the target so no need for member mappings.
The data load rule includes the bind variable and data extract query as they were set at rule level.

I set scenario to “Actual” which will mean when the SQL query is executed this value will be used as the bind variable.
The equivalent in Data Integration is in Options and part of the Filters tab.

Now we are ready to run the data load rule. The agent is currently running in asynchronous mode and polling the cloud every 30 seconds.

The import stage for the integration is run.

In process details you will see the process is running.

In the process log you can view the database extract process.
10:00:56,078 INFO [AIF]: ************************************************************************************
10:00:56,078 INFO [AIF]: *On Prem DB Extract: Started *
10:00:56,078 INFO [AIF]: ************************************************************************************
10:00:56,203 DEBUG [AIF]: Adding DB credentials
10:00:56,204 DEBUG [AIF]: Adding DB bind variables
10:00:56,205 DEBUG [AIF]: Adding DB query
10:00:56,207 INFO [AIF]: Original Extract Query:SELECT ENTITY,PRODUCT,ACCOUNT,AMOUNT
FROM V_ACTDATA
WHERE SCENARIO=~SCENARIO~
10:00:56,207 DEBUG [AIF]: Adding delimiter
10:00:56,208 DEBUG [AIF]: Adding fetchSize
10:00:56,212 INFO [AIF]: Retrieved EPM Cluster name:EPMAGENT_ASYNC
10:00:56,213 INFO [AIF]: Retrieved Cluster Mode:ASYNC
10:00:56,216 INFO [AIF]: Calling agent extract ASYNC mode: BEGIN
10:00:56,216 INFO [AIF]: Request Payload Length:469
10:00:56,231 DEBUG [AIF]: Updating process steps: QUEUED
10:00:56,234 DEBUG [AIF]: Agent Status: QUEUED
The database credentials, SQL query and bind variable, delimiter and fetch size are collated. This information will be passed to the agent once it requests the information.
The cluster name and mode are retrieved, the process is queued until the agent makes the next poll to the Cloud.

The agent makes a poll to the Cloud and as a process has been initiated, the response from the Cloud will return the Process (Job) ID.
As a Process ID has been returned the agent now makes a request to the Cloud for the details of the job. The information collated earlier is returned to the agent (all encrypted).
The agent will connect to the source database, execute the SQL query with the bind variable value, create an extract data file, upload the file to the Cloud, and upload the process log.
The details of this process are contained in the agent process log. The log includes the SQL query and the bind variable value.
10:01:06:086 :: *************** Starting execution for sessionId:945 at: Oct-06 10:01:06:086***************
10:01:06:086 :: Process Extract Request with data:--------------Executor Request Data--------------
jobType:EXTRACT
sessionID:945
Data Source Name:EPMAGENT_ORA_DEMO
credStore:CLOUD
query:SELECT ENTITY,PRODUCT,ACCOUNT,AMOUNT
FROM V_ACTDATA
WHERE SCENARIO=~SCENARIO~
outputType:FILE
delimiter:,
--------------Bind Variables--------------
Name: SCENARIO, Value:Actual, Type:STRING
--------------------------------------------
10:01:06:086 :: --------------- Executing Custom Event :BefExtract ---------------
10:01:09:539 :: Script: C:\EPMAgent\appdata\scripts\BefExtract.py Not found.
10:01:10:148 :: Adding String Bind Variable: SCENARIO with value: Actual
10:01:10:227 :: Writing extract output to file: C:\EPMAgent\appdata\data\945.dat
10:01:10:258 :: --------------- Completed execution for sessionId:945 ---------------
10:01:10:258 :: --------------- Executing Custom Event :AftExtract ---------------
10:01:10:258 :: Script: C:\EPMAgent\appdata\scripts\AftExtract.py Not found.
10:01:10:258 :: --------------- Executing Custom Event :BefUpload ---------------
10:01:10:258 :: Script: C:\EPMAgent\appdata\scripts\BefUpload.py Not found.
10:01:10:258 :: Commencing file upload to cloud for file:C:\EPMAgent\appdata\data\945.dat
10:01:11:602 :: File Upload successfully complete
10:01:11:602 :: --------------- Executing Custom Event :AftUpload ---------------
10:01:11:602 :: Script: C:\EPMAgent\appdata\scripts\AftUpload.py Not found.
10:01:12:148 :: Commencing file upload of log file:C:\EPMAgent\appdata\logs\945.log
10:01:12:242 :: *************** End execution for sessionId:945 ***************
The agent has been started with the Jython home variable populated.

As this has been populated the agent will attempt to run the four event scripts. I have not created any event scripts yet so no events will be executed. I will be starting to introduce event scripts from the next post.
If the Jython home property was left blank the agent would not attempt to run the scripts.
If the Groovy home property was defined, the agent would attempt run four Groovy event scripts.
The process log is generated in the application data logs folder along with the main agent log. The format for log is.log

The agent process log is uploaded to the Cloud and appended to the main process log.
INFO [AIF]: Appending EPM agent log to process: BEGIN
INFO [AIF]: Appending EPM agent log to process:: END
The data extract file is generated in the application data folder. The format for the data file is.dat

The extract file will include column headers.

The column headers are matched in the Cloud. This is why it is important that the columns returned by the SQL query are the same as the ones defined in the application.
DEBUG [AIF]: EPMFDM-140274:Message - Datasource Column Position in header: AMOUNT -> 4
The remaining steps of the import and validate process will be same as file-based integration.

For each cluster there will be additional queue and process information available in Data Integration.

If the agent is running in synchronous mode, the only difference would be the Cloud makes a direct call to the agent through the Web URL to execute the job. There, process ID is sent directly to the agent so there is no waiting for a poll.

So now we can extract data from a remote Oracle database and load this to EPM Cloud. This is all done using default functionality and no custom scripting.
In the next part I will extract data from a SQL Server database and start to look at event scripts.
Now that the agent is running, it is time to look at our first integration. In this post I will go through extracting data from a remote relational database and loading to EPM Cloud.
The first example will be against an Oracle database, but I will also cover SQL Server in the next post. The good news is you are not restricted to these two database types, you have the power to connect to any source.
Before starting out, you need to be sure that you can connect to the source database from the machine running the agent. I simply confirmed this by telnetting to the Oracle database server and port.
For simplicity, I have created a database view which queries the tables and data I am interested in and produces the desired output. It doesn’t have to be a view, data can be extracted using a SQL query against the source tables.
The next stage is to create a SQL query in Data Integration that will be executed by the agent to extract the data.
Go to Data Integration > Actions > Query
Add a new query.
Enter a new name for the query and the SQL statement.
You will notice that I have ~SCENARIO~ in the SQL statement. This is a bind variable and must be enclosed with a tilde, this allows you to filter the data extract. It is possible to set the value either at data load rule or application level. These can also be updated using custom event scripting and I will provide an example in the next part.
The most important part about the SQL statement is the column names. They will have to match with what is created in the data source which I will get on to shortly.
It is possible to use alias names for the column in the SQL query.
Once the query has been created it is possible to edit, delete or create additional queries.

The next step is to create a comma separated file with one line containing all the possible columns that can be returned from various SQL queries. The file I have created has more columns than the SQL query above, this is because I intend to have additional queries that return different data sets.
As I just mentioned it is important that the names match to those that will be returned from the SQL queries.
The name of the file will become the name of the target application in Data Management. I know it is confusing calling it a target application when it is a source.
The mindset that you need to be in is to treat the integration as a file-based integration even though you are connecting to a relational source. The agent will execute the SQL query against the source database, extract the data and create a file, this file will contain column headers that match the columns in the SQL query. The file will be automatically uploaded to the cloud and imported where the column headers in the file will be matched to what has been defined in the cloud.
It should become clearer as I go through the full process.
To create the Data Source, go to Data Management as there is not yet full parity in Data Integration.
Go to Target Application > Add > Data Source
From the dropdown select “On Premise Database”, this doesn’t mean the database must be on-premise, it can cloud or on-premise if the agent has good connectivity to it.
This will open the file selection window. Upload the file with the column names and select it.
The file name now has been converted into the application name. A prefix can be added if there is already an application with the same name.
An application will be created with dimensions based on the header columns in the selected file.
I know it is a little confusing because they are really source columns and not dimensions.
The target dimension class should be left as “Generic” and no “Data Table Column Name” assignments are required. If your SQL extracts are going to include additional columns, then you can manually add them at any point to the application.
Next on to the Application Filters tab which provides options to configure the connection to the source database.
Data Extract Query – This is the name of the SQL query to execute. It is possible to define this at application or rule level.
Delimiter – This will be the delimiter that is used when the agent creates the data extract file.
Credential Store – This provides the option to either store database connection information in the cloud or in a file. If “Cloud” is selected the connection information is entered in the application filters. If File is chosen, a file will need to be created in the agent’s application data config directory in the same location as the agent initialisation file. The database user’s password in the file will require to be encrypted using the “encryptpassword” script.
For this example, I am going to go for the “Cloud” option and will cover “File” in the next example.
JDBC Driver – This is the driver for connecting to the source database. Currently there is only “Oracle” and “Microsoft SQL Server”, but I am sure this will increase in future releases. This doesn’t mean you can connect to only those database types though, with the use of event scripting you can connect to pretty much any source.
JDBC URL – This is the database connection string. The Oracle syntax I will be using is
jdbc:oracle:thin:@dbhost:port/service
Username/Password are for the user you want to connect to the database with.
Fetch Size – This is the number of records that the JDBC driver fetches with each call to the database when executing the SQL query.
This is my completed set of property values.
In my SQL query I was filtering on scenario and included a bind variable. To create a bind variable, select “Edit”.
This will then display all the application filters.
The display order should be a value which is not already being used. It will be the order they are displayed in the UI. The validation type should be set to “None”.
I also updated the display level for the data exact query to be “Application and Rule”. This will mean you can override the query defined at the application in the data load rule.
The integration can now be built up as if building a standard file-based one.
The delimiter should match what has been set in the application filters.
To keep things simple, I have used expressions to map the source values directly to the target so no need for member mappings.
The data load rule includes the bind variable and data extract query as they were set at rule level.
I set scenario to “Actual” which will mean when the SQL query is executed this value will be used as the bind variable.
The equivalent in Data Integration is in Options and part of the Filters tab.
Now we are ready to run the data load rule. The agent is currently running in asynchronous mode and polling the cloud every 30 seconds.
The import stage for the integration is run.
In process details you will see the process is running.
In the process log you can view the database extract process.
10:00:56,078 INFO [AIF]: ************************************************************************************
10:00:56,078 INFO [AIF]: *On Prem DB Extract: Started *
10:00:56,078 INFO [AIF]: ************************************************************************************
10:00:56,203 DEBUG [AIF]: Adding DB credentials
10:00:56,204 DEBUG [AIF]: Adding DB bind variables
10:00:56,205 DEBUG [AIF]: Adding DB query
10:00:56,207 INFO [AIF]: Original Extract Query:SELECT ENTITY,PRODUCT,ACCOUNT,AMOUNT
FROM V_ACTDATA
WHERE SCENARIO=~SCENARIO~
10:00:56,207 DEBUG [AIF]: Adding delimiter
10:00:56,208 DEBUG [AIF]: Adding fetchSize
10:00:56,212 INFO [AIF]: Retrieved EPM Cluster name:EPMAGENT_ASYNC
10:00:56,213 INFO [AIF]: Retrieved Cluster Mode:ASYNC
10:00:56,216 INFO [AIF]: Calling agent extract ASYNC mode: BEGIN
10:00:56,216 INFO [AIF]: Request Payload Length:469
10:00:56,231 DEBUG [AIF]: Updating process steps: QUEUED
10:00:56,234 DEBUG [AIF]: Agent Status: QUEUED
The database credentials, SQL query and bind variable, delimiter and fetch size are collated. This information will be passed to the agent once it requests the information.
The cluster name and mode are retrieved, the process is queued until the agent makes the next poll to the Cloud.
The agent makes a poll to the Cloud and as a process has been initiated, the response from the Cloud will return the Process (Job) ID.
As a Process ID has been returned the agent now makes a request to the Cloud for the details of the job. The information collated earlier is returned to the agent (all encrypted).
The agent will connect to the source database, execute the SQL query with the bind variable value, create an extract data file, upload the file to the Cloud, and upload the process log.
The details of this process are contained in the agent process log. The log includes the SQL query and the bind variable value.
10:01:06:086 :: *************** Starting execution for sessionId:945 at: Oct-06 10:01:06:086***************
10:01:06:086 :: Process Extract Request with data:--------------Executor Request Data--------------
jobType:EXTRACT
sessionID:945
Data Source Name:EPMAGENT_ORA_DEMO
credStore:CLOUD
query:SELECT ENTITY,PRODUCT,ACCOUNT,AMOUNT
FROM V_ACTDATA
WHERE SCENARIO=~SCENARIO~
outputType:FILE
delimiter:,
--------------Bind Variables--------------
Name: SCENARIO, Value:Actual, Type:STRING
--------------------------------------------
10:01:06:086 :: --------------- Executing Custom Event :BefExtract ---------------
10:01:09:539 :: Script: C:\EPMAgent\appdata\scripts\BefExtract.py Not found.
10:01:10:148 :: Adding String Bind Variable: SCENARIO with value: Actual
10:01:10:227 :: Writing extract output to file: C:\EPMAgent\appdata\data\945.dat
10:01:10:258 :: --------------- Completed execution for sessionId:945 ---------------
10:01:10:258 :: --------------- Executing Custom Event :AftExtract ---------------
10:01:10:258 :: Script: C:\EPMAgent\appdata\scripts\AftExtract.py Not found.
10:01:10:258 :: --------------- Executing Custom Event :BefUpload ---------------
10:01:10:258 :: Script: C:\EPMAgent\appdata\scripts\BefUpload.py Not found.
10:01:10:258 :: Commencing file upload to cloud for file:C:\EPMAgent\appdata\data\945.dat
10:01:11:602 :: File Upload successfully complete
10:01:11:602 :: --------------- Executing Custom Event :AftUpload ---------------
10:01:11:602 :: Script: C:\EPMAgent\appdata\scripts\AftUpload.py Not found.
10:01:12:148 :: Commencing file upload of log file:C:\EPMAgent\appdata\logs\945.log
10:01:12:242 :: *************** End execution for sessionId:945 ***************
The agent has been started with the Jython home variable populated.
As this has been populated the agent will attempt to run the four event scripts. I have not created any event scripts yet so no events will be executed. I will be starting to introduce event scripts from the next post.
If the Jython home property was left blank the agent would not attempt to run the scripts.
If the Groovy home property was defined, the agent would attempt run four Groovy event scripts.
The process log is generated in the application data logs folder along with the main agent log. The format for log is
The agent process log is uploaded to the Cloud and appended to the main process log.
INFO [AIF]: Appending EPM agent log to process: BEGIN
INFO [AIF]: Appending EPM agent log to process:: END
The data extract file is generated in the application data folder. The format for the data file is
The extract file will include column headers.
The column headers are matched in the Cloud. This is why it is important that the columns returned by the SQL query are the same as the ones defined in the application.
DEBUG [AIF]: EPMFDM-140274:Message - Datasource Column Position in header: AMOUNT -> 4
The remaining steps of the import and validate process will be same as file-based integration.
For each cluster there will be additional queue and process information available in Data Integration.
If the agent is running in synchronous mode, the only difference would be the Cloud makes a direct call to the agent through the Web URL to execute the job. There, process ID is sent directly to the agent so there is no waiting for a poll.
So now we can extract data from a remote Oracle database and load this to EPM Cloud. This is all done using default functionality and no custom scripting.
In the next part I will extract data from a SQL Server database and start to look at event scripts.