The 19.06 EPM Cloud release brought new functionality into Data Management to export data from a source application to a file. No doubt you are probably aware that this could already be achieved using a custom application, though this new option provides many enhancements over the custom application and will end up replacing it. The Cloud Readiness What’s New document provides a good explanation:
“The Data Export to File option in Data Management enables you to export data from an EPM application to a data file. You can use the data file to load data into an ERP application or an external system. The new Data Export to File option provides several enhancements over the existing Custom Application option and will provide performance improvement when using the Simple workflow mode option.
Both the Data Export to File option and custom target application options are supported in this release. Eventually, the Data Export to File option will supersede the custom target application option due to its enhanced functions and capabilities.
Starting with this release, you can migrate your existing custom target applications to Data Export to File application using a new Upgrade Custom Application script. The new script is available under the System Maintenance and it can be run for an individual or all scripts”
This new functionality certainly sounds promising as custom applications have always been lacking in functionality and with no custom scripting in the Cloud, the output file is not always in the desired format. I know I have had issues with extracting data and loading to target systems because of the limited features in Data Management.
In this post I am going to look at the new functionality and the aim is to extract data from a source planning BSO cube and generate an export file.
To keep things simple, I will be using the sample Vision application which has the following dimensions.

To start off with the “Data Export to File” option, a CSV file is required which defines the target columns and the order they will be in the export file.
I generated a file with the columns that I wanted in the final data export file. There is no need to include an amount column as that will be automatically generated.

Just as with a custom application, a new target application will need to be created. The filename will define the target application name in Data Management. I named the file “DATA_EXPORT.csv” which means the target application will be “DATA_EXPORT”.
A new local target application can be added.

There is now an additional option available to be selected called “Data Export to File”.

As soon as “Data Export to File” is selected, the file selection window is displayed. The file containing the target columns and order can be uploaded and selected.

Once the file has been selected, the application name will be generated and it is possible to add a prefix. If you want to keep the target name the same as an existing application you could add a prefix. I covered the ability to recreate multiple versions of the same application with a prefix in a previous post.

I will leave the prefix as I am happy with name generated from the filename.
The new application will now be created with a type of “Data Target”.

The dimension names and order are built from the columns in the file that was uploaded. The first column in the file will be defined with the “ACCOUNT” data table column name. This doesn’t mean the column has to be the account dimension, it is just one column must be defined against the “ACCOUNT” data table column.
For each of the columns the target dimension class will be set as generic and assigned a UD data table column name. The column order will define the order of the output file. If any of these settings are not what is required, they can be updated.
I am going to update Year and Period dimension classes so that they will be driven from the POV.

There are several different application options available. Some of these options I will go through later in the blog to demonstrate how they operate, many of the options can also be set at data load rule level.

You will notice the workflow mode is available, and by default it is set as simple. I covered the different workflow modes in my previous blog post so have a read if you are unclear what the options mean.
The simple mode makes sense as the idea is to export data out of the source application and create an output file in the quickest way possible, with the simple mode it doesn’t need to go through the full process of archiving the data.
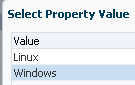
The “End of Line Character” option depends on what type of system the output file is going to be loaded to. For demo purposes I am going to set this to “Windows”.
For now, I am going to leave the remaining properties as default.
The next steps in building an integration are the same as you would usually follow. This can be done either in the Data Management standard interface or through the Data Integration simplified interface. I will show screenshots of both where possible. I did cover Data Integration in the simplified interface in a previous post.
An import format can be defined, selecting the source application to extract data from and the newly created application as the target.
The source application dimensions can be mapped to the target output file.

A new location is created where the import format is selected.

The equivalent in the simplified interface would be the source, target and location are defined in the general section. The name of the integration is basically what would be the data load rule name in Data Management.

The import format is part of map dimensions. As I want to keep this simple and don’t require data load mapping between source and target, I have added target expressions.

The target expression will copy the source value into the target. Once again, I covered expressions in detail in a prior blog.
Since I wrote the blog post, source expressions have been added, which pretty much replicate many of the target expressions.
Now on to creating the data load rule where the source plan type is selected. Source filters are added, which define the slice of data to extract; for any dimensions not included in the source filter the level 0 members will be extracted.

As I mentioned earlier target options can also be defined at either application or data load rule level. The default values in the rule will be picked up from the application level assigned values.

The exception for now is that the workflow mode can only be set at application level. I will leave the remaining options as default for now.
In Data Integration in the simplified interface these are set in the options section.

Now we are ready to run the integration, which will extract data from the source application and create a data export file.
With the new functionality there are no changes in the way the data is extracted from the source application.
For a BSO source application this is achieved using the DATEXPORT command. This can be viewed in the process log.
FIX (@Relative("Account",0),@Relative("Entity",0),"BaseData","May",@Relative("Product",0),"Actual","Working","FY19")
DATAEXPORT "File" "," "/u03/inbox/data/Vision_Plan1_382.txt" "#";
ENDFIX
For an ASO source application the extracted is carried out using MDX
INFO [AIF]: Extract Script (MDX): SELECT {[Period].[May]} ON COLUMNS,NON EMPTY {CROSSJOIN({[Version].[Working]},CROSSJOIN({Descendants([Entity].[Entity],[Entity].Levels(0))},CROSSJOIN({[Year].[FY19]},CROSSJOIN({Descendants([Channel].[Channel],[Channel].Levels(0))},CROSSJOIN({Descendants([Account].[Account],[Account].Levels(0))},CROSSJOIN({[Scenario].[Actual]},{Descendants([Product].[Product],[Product].Levels(0))}))))))} ON ROWS FROM BVision.Vis1ASO
These methods of extracting data will mean that only numerical data can be extracted from the source, maybe extracting all data types will be available in a future release.
With the workflow mode set as simple there will be no data records displayed in the workbench.
Data Management will look like the following:

In Data Integration the fish are no more, and the workbench will look something similar to:

In process details the output file can be downloaded,

or through Data Integration which also highlights the location of the file.

By default, the output file will be created in the outbox directory with the format:
<Target Application Name>_.dat
The file can be downloaded through the UI or alternatively using EPM Automate or the REST API. The issue with EPM Automate is if you run the data load rule it will not return the process ID, so it is not easy to know what the filename is going to be. This is not a problem with the REST API as the process ID is returned in the response when running a rule. I wrote a post about how this can be achieved, which you can read all about here.
A workaround for EPM Automate is to set a static filename in the options of the data load rule or target application.

If the export is run again the file is still generated in the outbox but an additional copy is created in the standard repository directory.
With the logging level increased to 5 you will be able to view the output files and locations in the process log.
INFO [AIF]: Name of the output data file: /u03/inbox/outbox/DATA_EXPORT_384.dat
DEBUG [AIF]: The output data file has been staged: /u03/lcm/DATA_EXPORT.csv
The file is accessible through the inbox/outbox explorer.

The file can be simply downloaded with EPM Automate.

Please Note: If you have the workflow mode set as simple then you will need to run the full import and export process together. If you run an import then an export, the output file will not contain data records. Basically if you are using the simple workflow mode then don't execute from the workbench.
The output file columns are the same order that was defined in the target application column order.

The header column names match those defined in the target application, this is much better than the custom application method where the column names would be data column names, for example.

With custom application there was no ability to remove the header.
Now with the new method it is possible to remove the header by setting the “Include Header” value to “No” in the load rule.

If the export is run again the header is not included.

If you want to sort the data by column then the “Sort Data” option can set to “Yes”.

After running the export again, each column has been sorted.

In the process log, the SQL that is generated to create the output file includes an “order by” clause.
There is an option to accumulate the data which will group the data when generating the output file.
For example, if I update the target expression from copy source to conditional.

The entity dimension is assigned to UD1 in the target application. The above conditional statement will map entities 110 and 111 to 100.
In the workbench there will separate records for the source entities that have been mapped to a single entity.

If the “Accumulate Data” option is set to “No”

separate records will be created in the output file (I have included the header again).

If the “Accumulate Data” option is set to “Yes”

the data in the output file will be grouped and the amount summed.

In the process log there will be a “group by” clause included in the SQL statement that generates the records for the output file.
Moving on to the next option: “Export Attribute Columns” which is useful for assigning static values. These are not to be confused with planning attributes.

For example, in the target application I added a new dimension, set it as an attribute dimension class and assigned it to the “ATTR1” data table column name. The column order for the output file was set to 6.

In the import format the target was mapped and a constant value applied to the source.

In the data load rule “Export Attribute Columns” was set to “Yes”.

The workbench confirms the attribute is being populated.

After creating the data file again, the new attribute column was included.

Going back to before adding the attribute, if the order of the columns in the output file need to be changed then all that needs to be done is to update the target application.
If I wanted to move the account column from 1 to 5 then the column order can be updated.

The account column has now been set to 5 and the other columns adjusted accordingly.

Running an export again will produce the output columns in the desired order.

On to the final option and that is the ability to pivot the data, this is a great feature as in the past I have had to write a script to change the format of output file from Data Management. As there is currently no custom scripting allowed in the cloud this had to be achieved outside of Data Management.
The “Pivot Dimension” can be set. In the following example I am going to set this to period, this should pivot the period members from the rows into the columns.

This time the integration is run for multiple periods.

The output file now has the period pivoted into the columns. Nice!

In the process log there will be a “pivot” clause included in the SQL statement that generates the records for the output file.
If you are currently using custom target applications, then now is the time to consider converting them to data target types. This means you will be able to benefit from the enhanced functionality and at some point, I am sure custom applications will be no longer be available.
There is no need to rebuild your integrations that are using custom applications because there is a system maintenance task available to handle the conversion.
Let us take an example. I have the following custom application which has rules associated with it.

The custom application has these options assigned to it:

There is a custom script available in system maintenance tasks which will convert the custom application.

After executing the script, the custom application can be selected.

The script will then run SQL statements to convert the application. After the script has completed, the target application should be a type of “Data Target”.

You may need to make some modifications to dimension details like applying all the column orders.
The application options should be verified as they are set as default. I had to set the download file name again.

Remember the options can also be set at data load rule level.
You should be able to run all the existing data load rules, but regression testing should be carried out to highlight any differences. It is probably a good idea to clear out any existing data if you have switched from full workflow mode to simple as it will still be archived in the TDATASEG table. Hopefully the simple workflow mode will work for you.
If you want to automate the process outside of Data Management/Integration, then this can be achieved with EPM Automate or the REST API. I have covered these many times in the past and you can read about a similar example here.
“The Data Export to File option in Data Management enables you to export data from an EPM application to a data file. You can use the data file to load data into an ERP application or an external system. The new Data Export to File option provides several enhancements over the existing Custom Application option and will provide performance improvement when using the Simple workflow mode option.
Both the Data Export to File option and custom target application options are supported in this release. Eventually, the Data Export to File option will supersede the custom target application option due to its enhanced functions and capabilities.
Starting with this release, you can migrate your existing custom target applications to Data Export to File application using a new Upgrade Custom Application script. The new script is available under the System Maintenance and it can be run for an individual or all scripts”
This new functionality certainly sounds promising as custom applications have always been lacking in functionality and with no custom scripting in the Cloud, the output file is not always in the desired format. I know I have had issues with extracting data and loading to target systems because of the limited features in Data Management.
In this post I am going to look at the new functionality and the aim is to extract data from a source planning BSO cube and generate an export file.
To keep things simple, I will be using the sample Vision application which has the following dimensions.
To start off with the “Data Export to File” option, a CSV file is required which defines the target columns and the order they will be in the export file.
I generated a file with the columns that I wanted in the final data export file. There is no need to include an amount column as that will be automatically generated.
Just as with a custom application, a new target application will need to be created. The filename will define the target application name in Data Management. I named the file “DATA_EXPORT.csv” which means the target application will be “DATA_EXPORT”.
A new local target application can be added.
There is now an additional option available to be selected called “Data Export to File”.
As soon as “Data Export to File” is selected, the file selection window is displayed. The file containing the target columns and order can be uploaded and selected.
Once the file has been selected, the application name will be generated and it is possible to add a prefix. If you want to keep the target name the same as an existing application you could add a prefix. I covered the ability to recreate multiple versions of the same application with a prefix in a previous post.
I will leave the prefix as I am happy with name generated from the filename.
The new application will now be created with a type of “Data Target”.

The dimension names and order are built from the columns in the file that was uploaded. The first column in the file will be defined with the “ACCOUNT” data table column name. This doesn’t mean the column has to be the account dimension, it is just one column must be defined against the “ACCOUNT” data table column.
For each of the columns the target dimension class will be set as generic and assigned a UD data table column name. The column order will define the order of the output file. If any of these settings are not what is required, they can be updated.
I am going to update Year and Period dimension classes so that they will be driven from the POV.
There are several different application options available. Some of these options I will go through later in the blog to demonstrate how they operate, many of the options can also be set at data load rule level.
You will notice the workflow mode is available, and by default it is set as simple. I covered the different workflow modes in my previous blog post so have a read if you are unclear what the options mean.
The simple mode makes sense as the idea is to export data out of the source application and create an output file in the quickest way possible, with the simple mode it doesn’t need to go through the full process of archiving the data.
The “End of Line Character” option depends on what type of system the output file is going to be loaded to. For demo purposes I am going to set this to “Windows”.
For now, I am going to leave the remaining properties as default.
The next steps in building an integration are the same as you would usually follow. This can be done either in the Data Management standard interface or through the Data Integration simplified interface. I will show screenshots of both where possible. I did cover Data Integration in the simplified interface in a previous post.
An import format can be defined, selecting the source application to extract data from and the newly created application as the target.
The source application dimensions can be mapped to the target output file.

A new location is created where the import format is selected.

The equivalent in the simplified interface would be the source, target and location are defined in the general section. The name of the integration is basically what would be the data load rule name in Data Management.


Since I wrote the blog post, source expressions have been added, which pretty much replicate many of the target expressions.
Now on to creating the data load rule where the source plan type is selected. Source filters are added, which define the slice of data to extract; for any dimensions not included in the source filter the level 0 members will be extracted.
As I mentioned earlier target options can also be defined at either application or data load rule level. The default values in the rule will be picked up from the application level assigned values.
The exception for now is that the workflow mode can only be set at application level. I will leave the remaining options as default for now.
In Data Integration in the simplified interface these are set in the options section.

Now we are ready to run the integration, which will extract data from the source application and create a data export file.
With the new functionality there are no changes in the way the data is extracted from the source application.
For a BSO source application this is achieved using the DATEXPORT command. This can be viewed in the process log.
FIX (@Relative("Account",0),@Relative("Entity",0),"BaseData","May",@Relative("Product",0),"Actual","Working","FY19")
DATAEXPORT "File" "," "/u03/inbox/data/Vision_Plan1_382.txt" "#";
ENDFIX
For an ASO source application the extracted is carried out using MDX
INFO [AIF]: Extract Script (MDX): SELECT {[Period].[May]} ON COLUMNS,NON EMPTY {CROSSJOIN({[Version].[Working]},CROSSJOIN({Descendants([Entity].[Entity],[Entity].Levels(0))},CROSSJOIN({[Year].[FY19]},CROSSJOIN({Descendants([Channel].[Channel],[Channel].Levels(0))},CROSSJOIN({Descendants([Account].[Account],[Account].Levels(0))},CROSSJOIN({[Scenario].[Actual]},{Descendants([Product].[Product],[Product].Levels(0))}))))))} ON ROWS FROM BVision.Vis1ASO
These methods of extracting data will mean that only numerical data can be extracted from the source, maybe extracting all data types will be available in a future release.
With the workflow mode set as simple there will be no data records displayed in the workbench.
Data Management will look like the following:
In Data Integration the fish are no more, and the workbench will look something similar to:

In process details the output file can be downloaded,

or through Data Integration which also highlights the location of the file.
By default, the output file will be created in the outbox directory with the format:
<Target Application Name>_
The file can be downloaded through the UI or alternatively using EPM Automate or the REST API. The issue with EPM Automate is if you run the data load rule it will not return the process ID, so it is not easy to know what the filename is going to be. This is not a problem with the REST API as the process ID is returned in the response when running a rule. I wrote a post about how this can be achieved, which you can read all about here.
A workaround for EPM Automate is to set a static filename in the options of the data load rule or target application.
If the export is run again the file is still generated in the outbox but an additional copy is created in the standard repository directory.
With the logging level increased to 5 you will be able to view the output files and locations in the process log.
INFO [AIF]: Name of the output data file: /u03/inbox/outbox/DATA_EXPORT_384.dat
DEBUG [AIF]: The output data file has been staged: /u03/lcm/DATA_EXPORT.csv
The file is accessible through the inbox/outbox explorer.
The file can be simply downloaded with EPM Automate.
Please Note: If you have the workflow mode set as simple then you will need to run the full import and export process together. If you run an import then an export, the output file will not contain data records. Basically if you are using the simple workflow mode then don't execute from the workbench.
The output file columns are the same order that was defined in the target application column order.
The header column names match those defined in the target application, this is much better than the custom application method where the column names would be data column names, for example.
With custom application there was no ability to remove the header.
Now with the new method it is possible to remove the header by setting the “Include Header” value to “No” in the load rule.
If the export is run again the header is not included.
If you want to sort the data by column then the “Sort Data” option can set to “Yes”.
After running the export again, each column has been sorted.
In the process log, the SQL that is generated to create the output file includes an “order by” clause.
There is an option to accumulate the data which will group the data when generating the output file.
For example, if I update the target expression from copy source to conditional.
The entity dimension is assigned to UD1 in the target application. The above conditional statement will map entities 110 and 111 to 100.
In the workbench there will separate records for the source entities that have been mapped to a single entity.
If the “Accumulate Data” option is set to “No”
separate records will be created in the output file (I have included the header again).
If the “Accumulate Data” option is set to “Yes”
the data in the output file will be grouped and the amount summed.
In the process log there will be a “group by” clause included in the SQL statement that generates the records for the output file.
Moving on to the next option: “Export Attribute Columns” which is useful for assigning static values. These are not to be confused with planning attributes.
For example, in the target application I added a new dimension, set it as an attribute dimension class and assigned it to the “ATTR1” data table column name. The column order for the output file was set to 6.
In the data load rule “Export Attribute Columns” was set to “Yes”.
The workbench confirms the attribute is being populated.

After creating the data file again, the new attribute column was included.
Going back to before adding the attribute, if the order of the columns in the output file need to be changed then all that needs to be done is to update the target application.
If I wanted to move the account column from 1 to 5 then the column order can be updated.
The account column has now been set to 5 and the other columns adjusted accordingly.
Running an export again will produce the output columns in the desired order.
On to the final option and that is the ability to pivot the data, this is a great feature as in the past I have had to write a script to change the format of output file from Data Management. As there is currently no custom scripting allowed in the cloud this had to be achieved outside of Data Management.
The “Pivot Dimension” can be set. In the following example I am going to set this to period, this should pivot the period members from the rows into the columns.
This time the integration is run for multiple periods.
The output file now has the period pivoted into the columns. Nice!
In the process log there will be a “pivot” clause included in the SQL statement that generates the records for the output file.
If you are currently using custom target applications, then now is the time to consider converting them to data target types. This means you will be able to benefit from the enhanced functionality and at some point, I am sure custom applications will be no longer be available.
There is no need to rebuild your integrations that are using custom applications because there is a system maintenance task available to handle the conversion.
Let us take an example. I have the following custom application which has rules associated with it.
The custom application has these options assigned to it:
There is a custom script available in system maintenance tasks which will convert the custom application.
After executing the script, the custom application can be selected.
The script will then run SQL statements to convert the application. After the script has completed, the target application should be a type of “Data Target”.
You may need to make some modifications to dimension details like applying all the column orders.
The application options should be verified as they are set as default. I had to set the download file name again.
Remember the options can also be set at data load rule level.
You should be able to run all the existing data load rules, but regression testing should be carried out to highlight any differences. It is probably a good idea to clear out any existing data if you have switched from full workflow mode to simple as it will still be archived in the TDATASEG table. Hopefully the simple workflow mode will work for you.
If you want to automate the process outside of Data Management/Integration, then this can be achieved with EPM Automate or the REST API. I have covered these many times in the past and you can read about a similar example here.

Thanks! It was really helpful.
ReplyDeleteIs there a way to get member alias instead of member names in the data export file ?
Add the aliases as target mappings then they will be in the file.
ReplyDeleteCheers
John
This article was really helpful.
ReplyDeleteIs it possible to export the data for an ASO cube using this feature?
Thanks,
Alphonse
It should be possible, nothing has changed with the way it exports data from the source Essbase database
ReplyDeleteGreat post!! Is it possible to export text, smartlist or date members using Data management rules to a text file? I've tried but it brings me the numbers instead of the texts
ReplyDeleteCurrently it is not possible, this is because the export is done against the Essbase database so it is only numerical data. Maybe in the future it will be possible to export all data types
ReplyDelete